Open topic with navigation
Trade Confirmation Flex Queries
The Trade Confirms Flex page lets you create multiple, customized report templates for trade confirmations. A trade confirmation Flex Query lets you specify the exact fields you want to view in your report, the time period you want the report to cover, the order in which you want the fields to appear in the report, and the display format for the report.
You can create multiple Flex Queries with different fields for each query. All of your Flex queries are stored in Account Management.
You can also add a default Flex Query, then use it as the basis for your own by editing it.
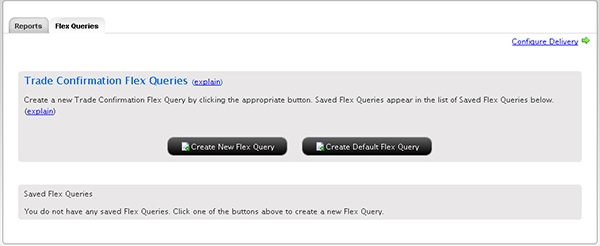
The Flex Queries page lets you create a new flex query or edit an existing Flex Query. Existing Flex Queries are displayed in the Saved Flex Queries section of the page. You can also edit the default Flex Query to use it as the basis for your own Flex Query.
Saved Flex Queries are available for the four previous calendar years and from the start of the current calendar year.
 Who can access the Trade Confirmation Flex Queries page?
You can access this page if you are a(n):
- Individual, Joint, Trust or IRA Account User
- Small Business Account User
- Friends and Family Group Master or Client User
- Advisor Master User Individual
- Advisor Master User Organization
- Advisor Client User Individual
- Advisor Client User Organization
- Proprietary Trading Group Master User
- Proprietary Trading Group Sub User
- Broker Master User (master account only)
- Broker Fully Disclosed Client User
- Broker Fully Disclosed Client User Organization
- Investment Manager Master User
- Fund
and you have been granted Reporting access rights.
To create a trade confirmation flex query
- Click Reports > Trade Confirmations > Flex Queries.
- Do any of the following:
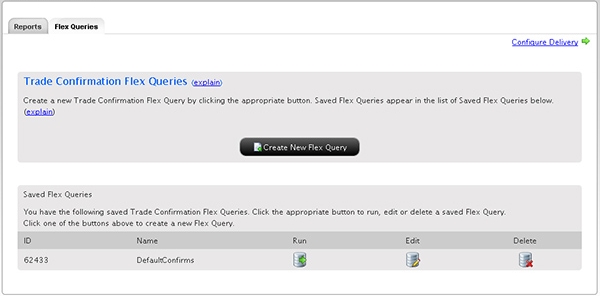
- To create a new query, click Create New Flex Query.
- To run an existing query, click Run for the query.
- To edit an existing query, click Edit for the query, then make your changes to the query and click Save Query.
- To delete an existing query, click Delete.
- To add the Default Trade Confirmation Flex Query, click Create Default Flex Query.
Note that when you add a default query to the list, the button disappears from the page. If you delete a default query from the list, the button re-appears.
- If you clicked Create New Flex Query, a new page appears on which you create your new Flex Query.
If you have a multiple account structure such as an institution account or multiple linked accounts, use the Account Selector at the top of the page to select one or more accounts on which to report. To include accounts that you have recently closed, select the Include Closed Accounts check box. If you choose to include closed accounts, those accounts appear in the Account Selector.

- Make selections and set options in the Configuration sections as follows:
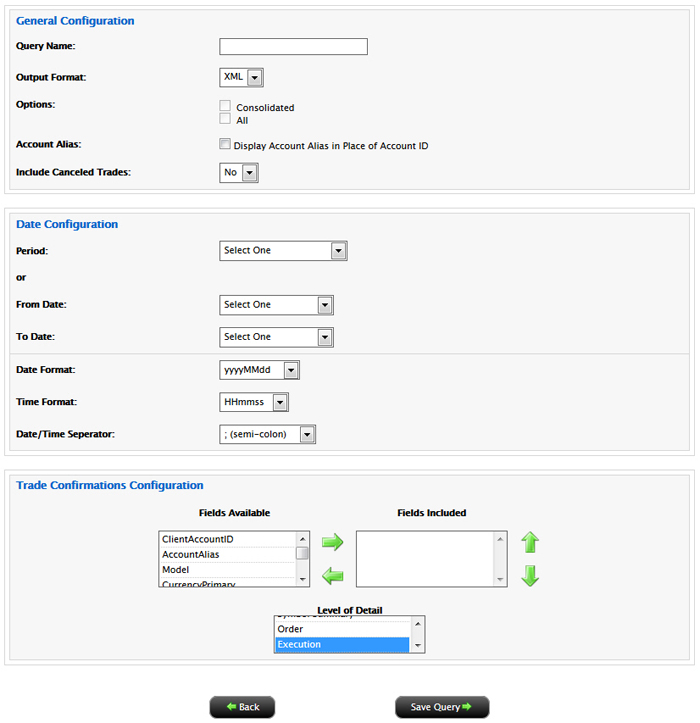
- In the Query Name field, enter the name of the flex query.
- In the Output Format list, select Text or XML. If you select Text, you must also choose a delimiting character (comma, pipe or tab character), and optionally choose to include header and trailer records; column headers; and section code and line descriptors.
- Select other options as required. Note that the Consolidated and All options are only available when the master account has been selected in the Account Selector.
- In the Date Configuration section, select the period for the Flex Query, or enter a range of dates in the From Date and To Date fields. The following periods are available:
Today
Last Business Day
Last Month
Last 30 Calendar Days
Last 365 Calendar Days
Month to Date
Year to Date
Last Business Week (Mon-Fri)
Last N Calendar Days (when you select this option, you must then select a number from 1 to 365 from a drop-down)
- In the Date Configuration section, select a Date Format, Time Format and Date/Time Separator:
Available date formats are:
yyyyMMdd (default)
yyyy-MM-dd
MM/dd/yyyy
MM/dd/yy
dd/MM/yyyy
dd/MM/yy
dd-MMM-yy
Available time formats are:
HHmmss (default)
HH:mm:ss
Available date/time separators are:
; (semi-colon, the default)
, (comma)
'' (single-spaced)
No separator
- Advisors, Money Managers and Brokers and master account users with reporting access rights who select their own master account in the Account Selector have access to client-only consolidated and concatenated reports. Select Consolidated (Clients-Only) to generate trade confirmations for all clients combined into a single report, or Concatenate All (Clients-Only) to generate statements for all client accounts in a single report (multiple client reports are joined together in a single report).
- In the Trade Confirmation Configuration section, Select the fields to include in the Flex Query in by highlighting the fields in the Fields Available list, then using the green right arrow to move the fields to the Fields Included list. Use the green left arrow to move fields from the Fields Included list (and exclude the fields from the report).
- In the Trade Confirmation Configuration section, select your desired level of detail: Symbol Summary, Order or Execution. Execution is the default setting.
- Click Save Query.
The saved query will now appear in the list of saved queries on the Trade Confirmation Flex Queries page.
For more information